As usual, we made our device with odds and ends we found around the house and the neighborhood. As an aside, I think that is just as an important a lesson for the kids as the science is. Scrounging gives you a different eye for the world and I would argue that you learn to look for opportunities when you try and make things from freely available items. But I digress.
Our first cut at the weather vane consisted of some aluminum foil, a nail and a thin piece of particle board. Plywood would have worked as well for the base. The wood came from a local construction site. After I spoke with the foreman, they were more than happy to let me scrounge around for some scrap wood.
The instructions are simple. Fold the aluminum foil into a strip. You'll need several folds. I think we folded ours four times. Bang the nail through the board and then with a pencil, make a small cavity in the center of the foil strip. The cavity has to be placed so that the foil strip balances at that point and the cavity has to be larger than the point of the nail so that the strip will rotate freely. Place the strip on the nail and set it out in the wind. Here's what you get.
It bends! We have dishonored ourselves and our family. Prepare for ritual self-flagellation!
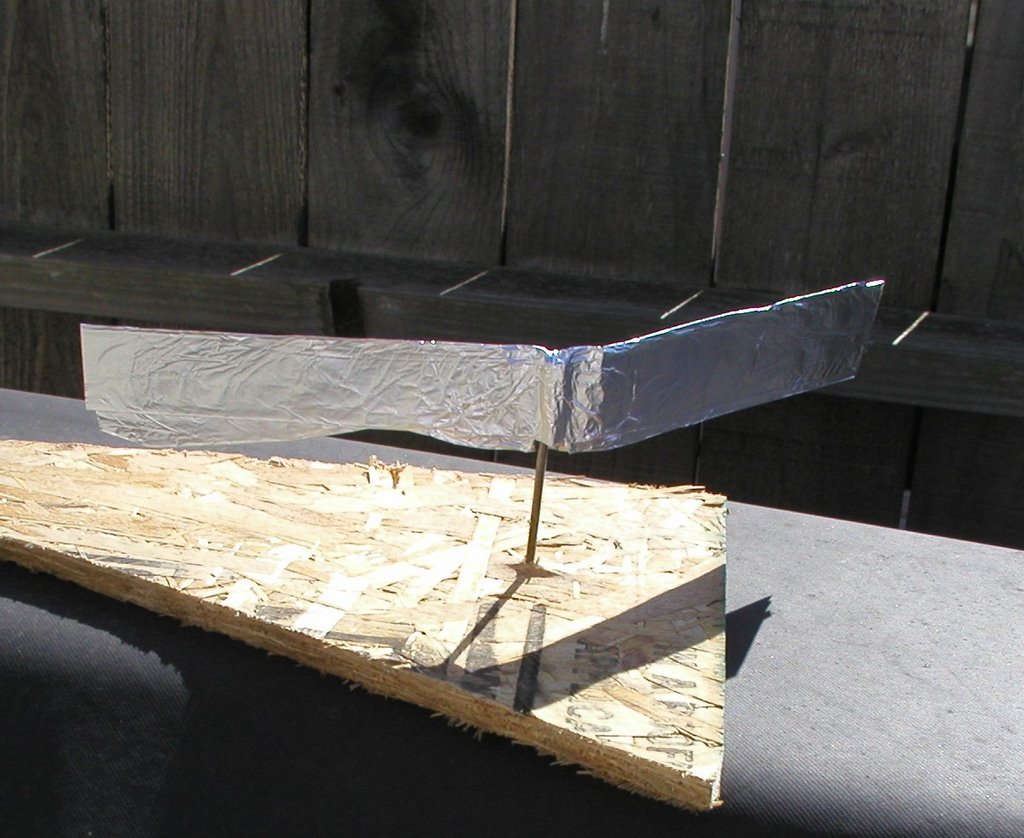
We then took a wooden barbecue skewer and folded the bottom of one side of the foil strip around it to stiffen the strip. We chose the wooden skewer because it was long, stiff and light weight. Anything heavier would have impaled the foil strip through the nail. In thinking about it now, we could have taken a paper clip, straightened it out and used that. Remember that you want the stiffener to be as straight as possible so that the wind vane operates with maximum efficiency. Here's what ours looked like.

A wind vane that will bring pride to our family. Our neighbors will be cast into the depths of despair when they see our glorious scientific device.
Well, that's it for this project. We're rummaging around for new DIY science ideas. Suggestions are always welcome.
For more fun projects, visit this week's Carnival of Homeschooling.
4 comments:
"We have dishonored our family"--
I was afraid the next step was hary-cary. Or however you spell that.
I considered recommending ritual suicide as a joke, but then thought better of it. I don't think I want to read in the newspaper about some poor, lost soul who killed themselves because a cat told them to.
LOL! If at first you don't succeed, try try again. ANOTHER good lesson.
Adapt, improvise, overcome! Yet ANOTHER good lesson.
We made our weather vain out of cardboard (for the arrow), some playdough, a pencil and a straight pin. Did you know that the arrow points INTO the wind?! I didn't until we concocted this crazy thing. :-D
That looks like a good project, and I agree that coming up with the materials teaches a lot of ingenuity.
We made a seismograph a couple of weeks ago and the children had a blast jumping up and down trying to register their bouncing. It actually worked, and my children scored a 3.0 on the Hanley scale.
Post a Comment